4.1 Node and key IP address
From CS1000 Element Manager
Navigation: System -> IP Network/Node: Server, Media cards
The IP Telephony Nodes page is displayed as show below. Click “<Node id>” in the Node ID column to view details of the node. In the sample configuration, Node ID “1” was used.
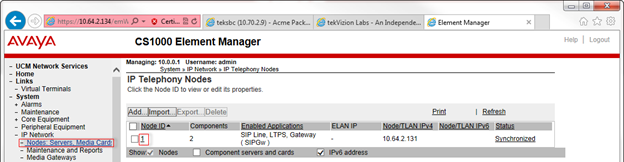
Figure 3: Node configuration-1
The Node Details screen is displayed with additional details as shown below. Under the Node Details heading at the top of the screen, make a note of the TLAN Node IPV4 address. In the sample screen below, the Node IPV4 address is “10.64.2.131”. This IP address will be needed when configuring Session Manager with a SIP Entity for the CS1000E.
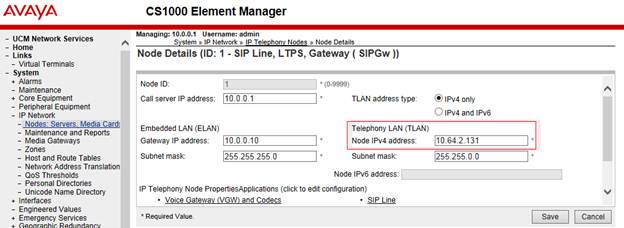
Figure 4: Node Configuration-2
Using the scroll bar on the right side of the screen, navigate to the Applications section on the screen and select the Gateway (SIPGw) link to view or edit the SIP Gateway configuration.
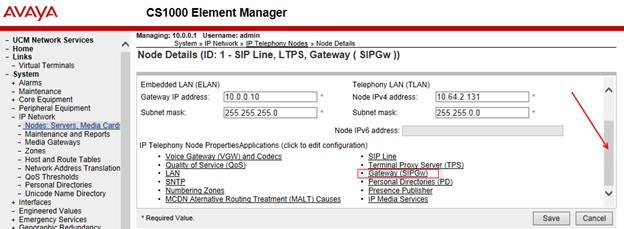
Figure 5: SIP Gateway Configuration-1
On the Node ID: 1 - Virtual Trunk Gateway Configuration Details page, enter the following values and use default values for remaining fields.
Check Enable gateway service on this node
SIP domain name: lab.avaya.com
Local SIP port: 5060
Gateway endpoint name: nortel---any name as we use Session manager instead of NRS
Application node ID: 1
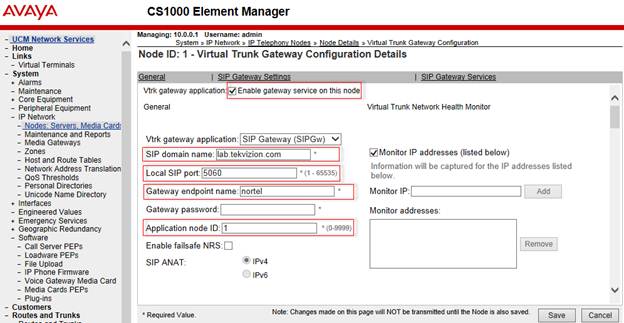
Figure 6: SIP Gateway Configuration-2
Scroll down to the SIP Gateway Settings ??Proxy or Redirect Server section.
Primary TLAN IP address: 10.70.2.6
Port:5060
Transport protocol :TCP

Figure 7: SIP Gateway Configuration-3
Scroll down to the SIP Gateway Settings -> SIP URI Map section:
Leave all Public E164 domain names fields to BLANK.
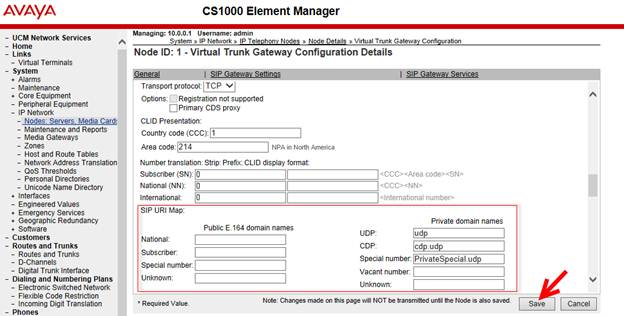
Figure 8: SIP Gateway Configuraiton-4
Click Save to save SIP Gateway configuration settings. This will return the interface to the Node Details screen. Click Save on the Node Details screen.
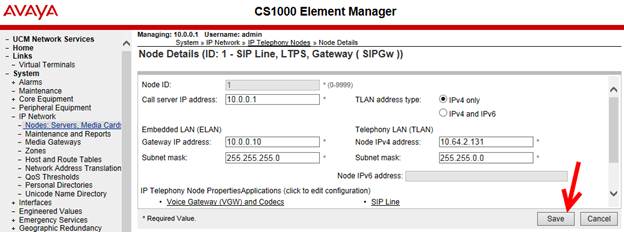
Figure 9: SIP Gateway Configuration-5
Select Transfer Now on the Node Saved page as shown below.
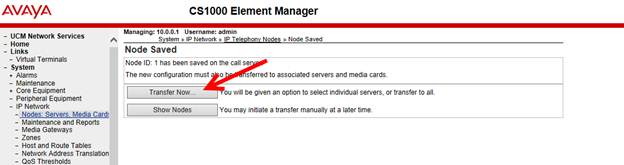
Figure 10: SIP Gateway Configuration-6
Select all components and then ”Start Sync”.
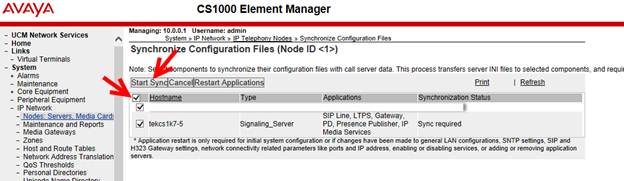
Figure 11: SIP Gateway Configuration-7
After Sync complete, Restart Applications:
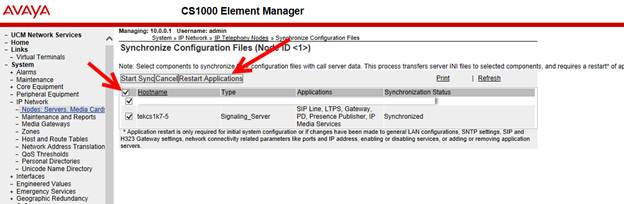
Figure 12: SIP Gateway Configuration-8