Topic Last Modified: 2011-04-11
You can move groups of users to the new Microsoft Lync Server 2010 deployment using the following two methods: Lync Server Control Panel and Lync Server Management Shell. There are requirements that must be met to ensure a smooth transition to Lync Server 2010. For details before completing the procedures in this topic, see Configure Clients for Migration.
 Important: Important: |
|---|
| You cannot use the Active Directory Users and Computers snap-in or the Microsoft Office Communications Server 2007 R2 administrative tools to move users from your legacy environment to Lync Server 2010. |
 Important: Important: |
|---|
| The Move-CsLegacyUser cmdlet requires that user names are properly formed and do not have leading or trailing spaces. You cannot move a user account using the Move-CsLegacyUser cmdlet if it contains leading or trailing spaces. |
When you move a user to a Lync Server 2010 pool, the data for the user is moved to the back-end database that is associated with the new pool.
 Important: Important: |
|---|
| This data includes the active meetings created by the legacy user. For example, if a legacy user has configured a my meeting conference, that conference will still be available in the new Lync Server 2010 pool, after the user has been moved. The details to access that meeting will still be the same conference URL and conference ID. The only difference is that the conference is now hosted in the Lync Server 2010 pool, and not in Office Communications Server 2007 R2 pool. |
 Note: Note: |
|---|
| Homing users on Lync Server 2010 does not require that you deploy upgraded clients at the same time. New functionality will be available to users only when they have upgraded to the new client software. |
 To move multiple users by using
the Lync Server Control Panel
-
Log on to the computer with an account that is a member of the RTCUniversalUserAdmins group or minimally a member of the CsUserAdministrator administrative role.
-
Open a browser window, and then enter the Admin URL to open the Lync Server Control Panel. For details about the different methods you can use to start Lync Server Control Panel, see Open Lync Server Administrative Tools.
-
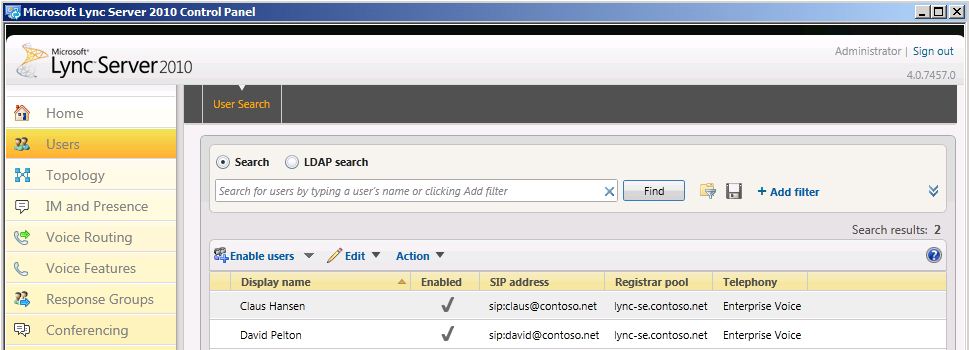
Click Users, click Add Filter, build the query Legacy user Equal to True, and then click Find.
-
In the search results, select at least two users.
-
Click Action ,and then click Move selected users to pool.
 Important:
If Move selected users to pool is not available, ensure the account is a member of the RTCUniversalUserAdmins group or a member of the CsAdministrator or CsUserAdministrator administrative role. -
In Move Users, select the Destination Registrar pool, which is your Lync Server 2010 pool, and then click OK.
-
Verify that the Registrar pool column for the user now contains the Lync Server 2010 pool, which indicates that the user has been successfully moved.

For details about the cmdlets described in this section, run:
 Copy Code
Get-Help <cmdlet name> -Detailed
 To move multiple
users by using the Lync Server Management Shell
-
Log on to the computer with an account that is a member of the RTCUniversalUserAdmins group or minimally a member of the CsUserAdministrator administrative role.
-
Start the Lync Server Management Shell: Click Start, click All Programs, click Microsoft Lync Server 2010, and then click Lync Server Management Shell.
-
At the command line, type the following and replace User1 and User2 with specific user names you want to move and replace pool_FQDN with the name of the destination pool:
 Copy Code
Get-CsUser -Filter {DisplayName -eq "User1" -or DisplayName - eq "User2"} | Move-CsLegacyUser -Target "pool_FQDN" -
At the command line, type the following
 Copy Code
Get-CsUser "User1"
The Registrar Pool identity should now point to the pool you specified as “pool_FQDN” in the previous step. The presence of this identity confirms that the user has been successfully moved.
 To move all users
at the same time by using the Lync Server Management Shell
-
Log on to the computer with an account that is a member of the RTCUniversalUserAdmins group or minimally a member of the CsUserAdministrator administrative role.
-
Start the Lync Server Management Shell: Click Start, click All Programs, click Microsoft Lync Server 2010, and then click Lync Server Management Shell.
-
At the command line, type the following:
 Copy Code
Get-CsUser -OnOfficeCommunicationServer | Move-CsLegacyUser -Target "pool_FQDN"
-
At the command line, type the following:
 Copy Code
Get-CsUser "user name"
where user name is the name of a legacy user.
The Registrar Pool identity now points to the pool you specified as “pool_FQDN” in the previous step. The presence of this identity confirms that the user has been successfully moved.
 Important:
The Move-CsLegacyUser cmdlet may fail with the following error:
Move-CsLegacyUser : SetMoveResourceData failed because the
user is not provisioned. At line:1 char:18 + Move-CsLegacyUser
<<<<  -Identity "jeff@contoso.net" -Target
"lync-se.contoso.net" + CategoryInfo : InvalidOperation: (CN=Jeff
Ander...contoso,DC=net:OCSADUser) [Move-CsLegacyUser],
MoveUserException + FullyQualifiedErrorId :
MoveLegacyUserError,Microsoft.Rtc.Management.AD.Cmdlets.MoveOcsLegacyUserCmdlet
If you experience this error, see the topic Verify User Replication has Completed for resolution.

