 See Also

Topic Last Modified: 2011-04-11
To successfully publish, enable, or disable a topology when adding or removing a server role, you should be logged in as a user who is a member of the RTCUniversalServerAdmins and Domain Admins groups. It is also possible to delegate the proper administrator rights and permissions. For details, see Delegate Setup Permissions. For other configuration changes, only membership in the RTCUniversalServerAdmins group is required.
After you define your topology in Topology Builder, you must publish the topology to the Central Management store. The Central Management store provides a robust, schematized storage of the data needed to define, set up, maintain, administer, describe, and operate a Microsoft Lync Server 2010 deployment. It also validates the data to ensure configuration consistency. All changes to this configuration data happen at the Central Management store, eliminating “out-of-sync” issues. Read-only copies of the data are replicated to all servers in the topology, including Edge Servers.
 Note: Note: |
|---|
| For Enterprise Edition only: In order to publish the topology, the SQL Server-based Back End Server must be online and accessible with firewall exceptions in place. For details about specifying firewall exceptions, see Understanding Firewall Requirements for SQL Server. For details about configuring SQL Server, see Configure SQL Server for Lync Server 2010. |
 To publish a topology
-
Start Topology Builder: Click Start, click All Programs, click Microsoft Lync Server 2010, and then click Lync Server Topology Builder.
-
Select to open the topology from a local file. If you are on the computer where you defined the topology, this will be in the location where you saved it in earlier steps. Typically, this will be the Documents folder of the user who configured the topology.
-
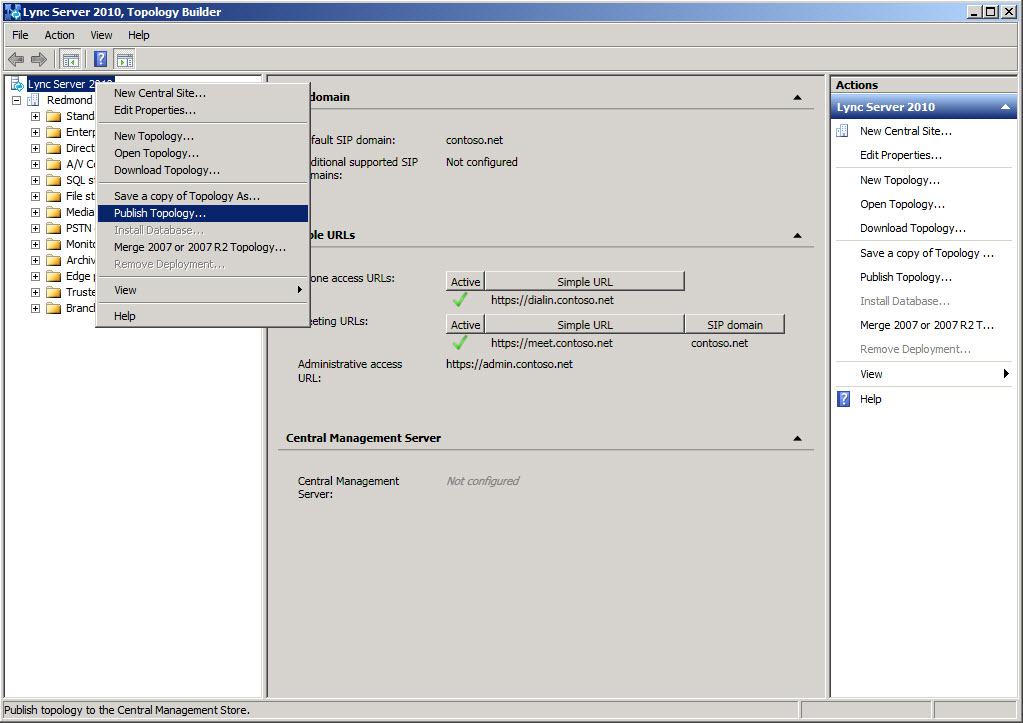
Right-click the Lync Server 2010 node, and then click Publish Topology.
-
On the Publish the topology page, click Next.

-
On the Create databases page, select the databases you want to publish.
Note:If you don’t have the appropriate rights to create the databases, you can clear the check boxes next to those databases, and someone with appropriate rights can later create the databases. For details, see Deployment Permissions for SQL Server. 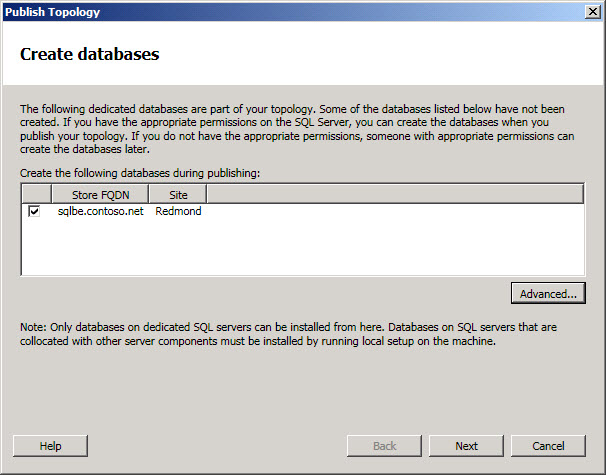
-
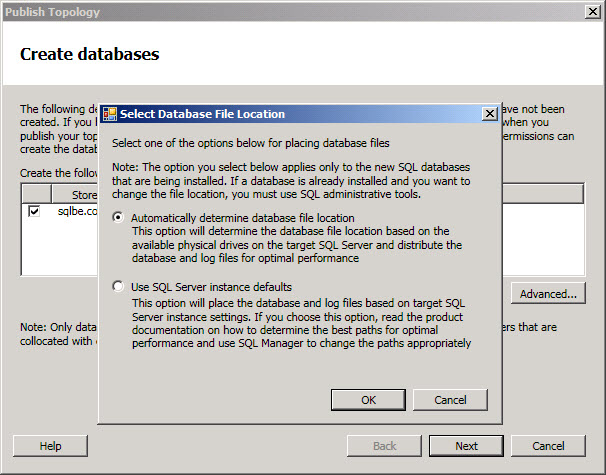
Optionally click Advanced. The Advanced SQL Server data file placement options allow you to select between the following options:
- Automatically determine database file location – This
option will determine the best operational performance based on the
disk configuration on your SQL Server-based server by distributing
the log and data files to the best location.
- Use SQL Server instance defaults – This option puts log
and data files onto the SQL Server-based server by using the
instance settings. This option does not use the operational
functionality of the SQL Server-based server to determine optimal
locations for logs and data. The SQL Server administrator would
typically move the log and data files to locations that are
appropriate for the SQL Server-based server and organization
management procedures.
Click OK, and then click Next.
- Automatically determine database file location – This
option will determine the best operational performance based on the
disk configuration on your SQL Server-based server by distributing
the log and data files to the best location.
-
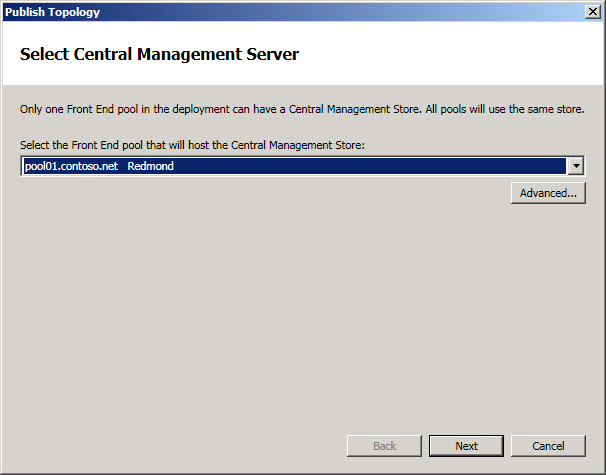
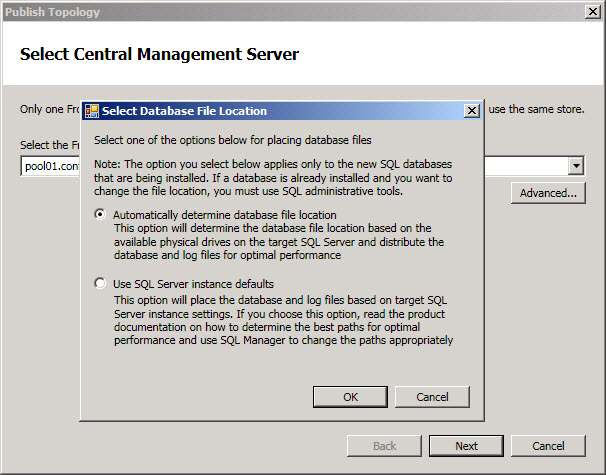
On the Select Central Management Server page, select a Front End pool.
-
Optionally click Advanced. The Advanced SQL Server data file placement options allow you to select between the following options:
- Automatically determine database file location – This
option will determine the best operational performance based on the
disk configuration on your SQL Server-based server by distributing
the log and data files to the best location.
- Use SQL Server instance defaults – This option puts log
and data files onto the SQL Server-based server by using the
instance settings. This option does not use the operational
functionality of the SQL Server-based server to determine optimal
locations for logs and data. The SQL Server administrator would
typically move the log and data files to locations that are
appropriate for the SQL Server-based server and organization
management procedures.
Click OK.
- Automatically determine database file location – This
option will determine the best operational performance based on the
disk configuration on your SQL Server-based server by distributing
the log and data files to the best location.
-
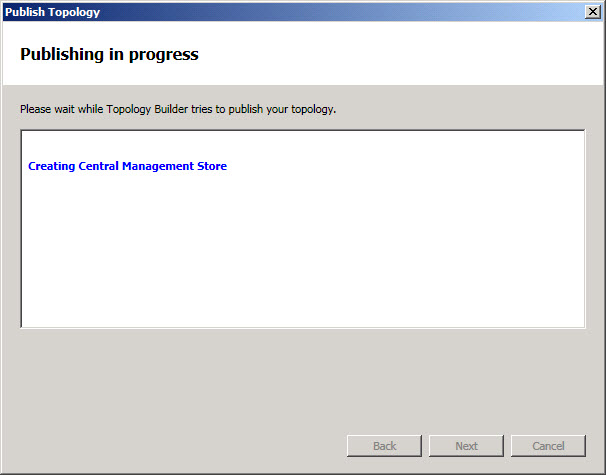
Click Next to complete the publishing process.
-
When the publish process has completed, click Finish.
When the topology has been published successfully, you can begin installing a local replica of the Central Management store on each server running Lync Server 2010 in your topology. We recommend that you begin with the first Front End pool.