

Topic Last Modified: 2011-02-25
 Important: Important: |
|---|
| This procedure assumes that you are adding an Audio/Video (A/V) Conferencing Server pool to an already deployed environment. If you are deploying your A/V Conferencing Server in conjunction with a defined topology that has the A/V Conferencing Server or Servers already published, you should proceed to this topic: Install the Local Configuration Store. |
To successfully complete this procedure, you can be logged on to the computer as a standard user. There are no special permissions or group assignments necessary to define the topology. To improve the A/V experience with a deployment of more than 10,000 users, we recommend that you deploy one or more stand-alone A/V Conferencing Servers. If necessary, review the hardware and software requirements for a stand-alone A/V Conferencing Server. For details about hardware requirements, see Server Hardware Platforms. For details about software prerequisites and requirements, see Additional Software Requirements.
You cannot convert an A/V Conferencing single computer pool to a multiple computer pool. If you later decide that your organization needs a pool with multiple computers, you must delete the single computer pool, and then add the multiple computer pool.
If you plan to implement an A/V Conferencing multiple computer pool in the future, select Multiple computer pool. Even though a pool is defined as two or more computers that are load balanced, you can create a single computer pool and create a pool fully qualified domain name (FQDN) for the single computer. When you are ready to add more computers to the pool later, you must re-run Topology Builder to define the new pool member, publish the new topology, and then set up the new A/V Conferencing pool member through the Lync Server Deployment Wizard. A/V Conferencing Server pools are unique in that they do not need load balancers to create a pool. A/V Conferencing pools load balance internally and do not need additional hardware.
 To define a stand-alone A/V
Conferencing Server with a single computer pool
To define a stand-alone A/V
Conferencing Server with a single computer pool
-
Log on to the computer where Topology Builder is installed.
-
Start Topology Builder: Click Start, click All Programs, click Microsoft Lync Server 2010, and then click Lync Server Topology Builder.
-
On the Welcome page, click Download Topology from existing deployment, and then click OK.
-
In the Save Topology As dialog box, choose a location, give the file an appropriate name, accept the default extension of .tbxml, and then click Save.
-
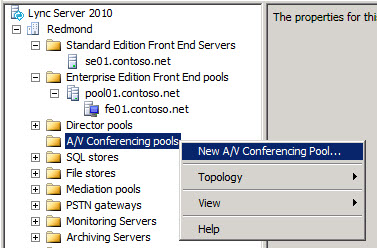
Expand the Server Role tree view, right-click A/V Conferencing pools, and then click New A/V Conferencing Pool.
-
On the Define the A/V Conferencing pool FQDN page, select Single computer pool, enter the FQDN, and then click Next.
-
On the Associate Front End pools page, select the Front End pool that you want to associate with the new A/V Conferencing Server, and then click Finish.
To define a stand-alone A/V
Conferencing Server with a multiple computer pool
-
Log on to the computer where Topology Builder is installed.
-
Start Topology Builder: Click Start, click All Programs, click Microsoft Lync Server 2010, and then click Lync Server Topology Builder.
-
On the Welcome page, click Download Topology from existing deployment, and then click OK.
-
In the Save Topology As dialog box, choose a location, give the file an appropriate name, accept the default extension of .tbxml, and then click Save.
-
Expand the Server Role tree view, right-click A/V Conferencing pools, and then click New A/V Conferencing Pool.
-
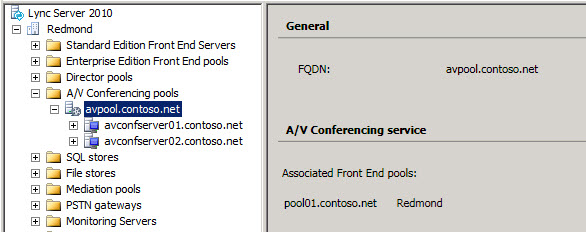
On the Define the A/V Conferencing pool FQDN page, select Multiple computer pool, enter the Pool FQDN, and then click Next.
-
On the Define the computers in this pool page, enter the FQDN of a computer to add to the pool, and then click Add. Perform this step for each computer you want to add to the pool, and then click Next.
-
On the Associate Front End pools page, select the Front End pool that you want to associate with the new A/V Conferencing Server, and then click Finish.