Topic Last Modified: 2011-04-05
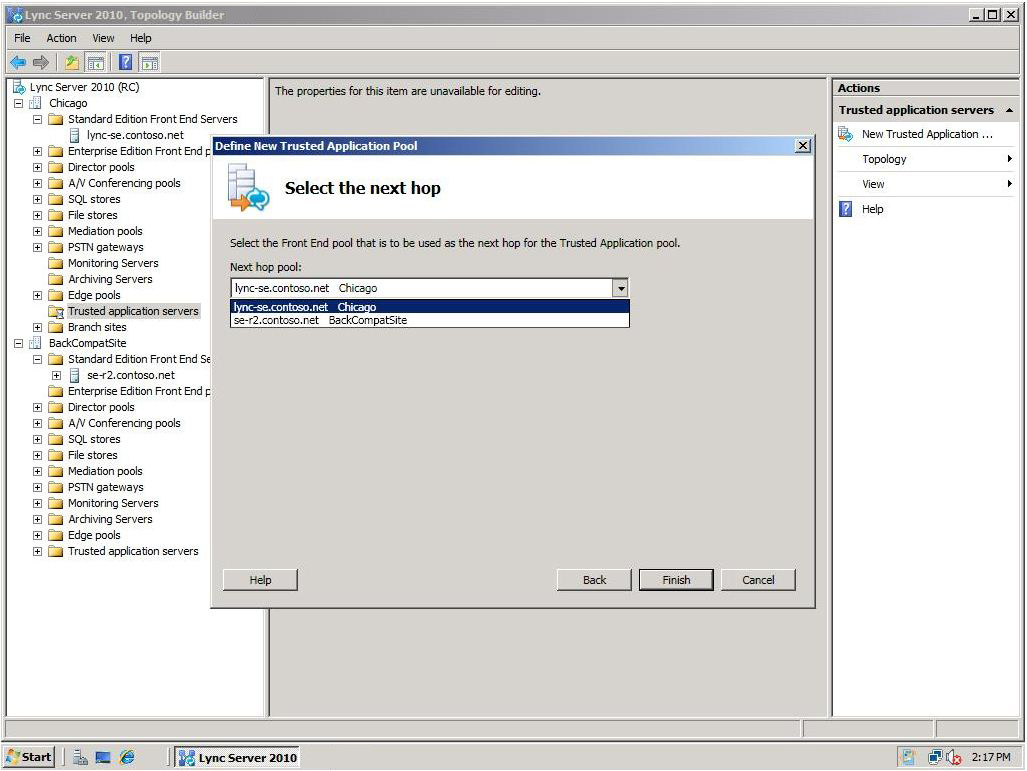
In a mixed environment, if you create a new trusted application server after merging the legacy Office Communications Server topology with Lync Server 2010, and you define a new trusted application server using Topology Builder, you must set the next hop pool to be a Lync Server 2010 pool. In a merged environment, both the legacy Office Communications Server pool and the Lync Server 2010 pool appear in the drop down list. Selecting the legacy pool is not supported.
To successfully publish, enable, or disable a topology when adding or removing a server role, you should be logged in as a user who is a member of the RTCUniversalServerAdmins and Domain Admins groups. It is also possible to delegate the proper administrator rights and permissions for adding server roles. For details, see Delegate Setup Permissions in the Lync Server 2010 Standard Edition server or Enterprise Edition server Deployment documentation. For other configuration changes, only membership in the RTCUniversalServerAdmins group is required.
Select Lync Server 2010 as next hop when creating a Trusted application server-
Log on to the computer with an account that is a member of the RTCUniversalServerAdmins group or has the equivalent administrator rights and permissions.
-
Start Topology Builder: Click Start, click All Programs, click Microsoft Lync Server 2010, and then click Lync Server Topology Builder.
-
Select the option to Download topology from existing deployment and then click OK.
-
In the Save Topology As dialog box, select the Topology Builder file you want to use, and click Save.
-
In the right pane, right click Trusted application servers and click New Trusted Application Pool.
-
Enter the Pool FQDN of the trusted application pool and select whether it will be a single-server or multiple-server.
-
Click Next.
-
On the Select the next hop page, from the list, select the Lync Server 2010 Front End pool. lync-se.contoso.net in our example.

-
Click Finish.
-
Select the top node Lync Server 2010 and from the Actions pane, select Publish.
The Trusted Application Pool should have been created successfully and is associated with the correct Front End pool.

