Topic Last Modified: 2011-04-12
After you have defined your topology, use the following procedure to define a Standard Edition server for your site. For details about defining the topology, see Define and Configure a Topology in Topology Builder.
 To define a Standard Edition
server
-
In the Define New Front End Pool Wizard, on the Define the New Front End pool page, click Next.
-
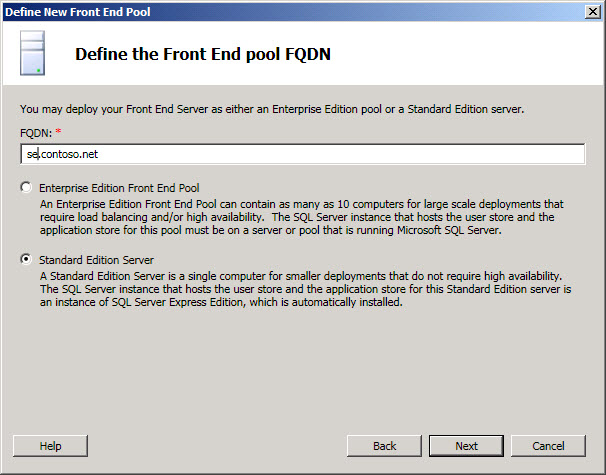
On the Define the Front End pool FQDN page, enter a fully qualified domain name (FQDN) for the Standard Edition server you are creating, select Standard Edition Server, and then click Next.
-
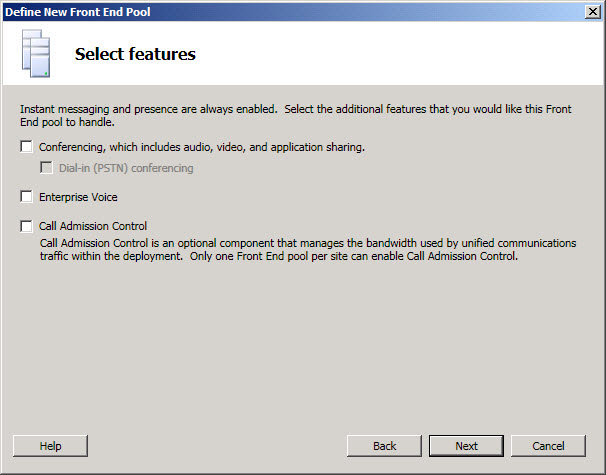
On the Select features page, select the check boxes for the features that you want on this Front End pool. For example, if you are deploying only instant messaging (IM) and presence features, you would select the Conferencing check box to allow multiparty IM, but would not select Dial-in (PSTN) conferencing, Enterprise Voice, or Call Admission Control, because they represent voice, video, and collaborative conferencing features.
- Conferencing – This selection enables a rich set of
features including:
- Instant messaging (IM) with more than two parties in an IM
session
- Conferencing, which includes document collaboration,
application sharing, and desktop sharing
- A/V conferencing, which enables users to have real-time
audio/video (A/V) conferences without the need for external
services such as the Live Meeting service or a third-party audio
bridge
- Instant messaging (IM) with more than two parties in an IM
session
- Dial-in (PSTN) conferencing - Allows users to join the
audio portion of a Lync Server 2010 conference by using a public
switched telephone network (PSTN) phone without requiring an audio
conferencing provider.
- Enterprise Voice - Enterprise Voice is the voice over IP
(VoIP) solution in Lync Server 2010 that allows users to make and
receive phone calls. You would deploy this feature if you plan to
use Lync Server 2010 for voice calls, voice mail, and other
functions that use a hardware device or a software client.
- Call admission control (CAC) – CAC determines, based on
available network bandwidth, whether to allow real-time
communications sessions such as voice or video calls to be
established. If you have deployed only IM and presence, CAC is not
needed because neither of these two features uses CAC.
 Note:
Note:Call admission control is recommended for your Front End Server in your Standard Edition deployment if you are deploying voice features or A/V conferencing. The following table shows the available features (top) and the functions offered to users (left). The selections in the table are what you should select to enable those features for your organization.
Conferencing Dial-In Conferencing Enterprise Voice Call Admission Control Instant messaging and presence
X
Conferencing
X
X
A/V conferencing
X
X
X
Enterprise Voice
X
X
- Conferencing – This selection enables a rich set of
features including:
-
On the Select collocated server roles page, the Collocate Mediation Server check box is selected by default. Clear the Mediation server check box if you intend to deploy a stand-alone Mediation Server.
 Warning:
The Collocate A/V Conferencing service option will be selected and will be unavailable for editing if you chose Conferencing on the Select features page in step 3 for a Standard Edition server. A Standard Edition server cannot be associated with a stand-alone A/V Conferencing Server and the A/V Conferencing service will be installed on the Standard Edition server if conferencing was selected on the Select features page. We recommend that you collocate the Mediation Server role on the Standard Edition Front End Server if possible.For details about support for collocated or stand-alone Mediation Servers, see Components and Topologies for Mediation Server in the Planning documentation.

-
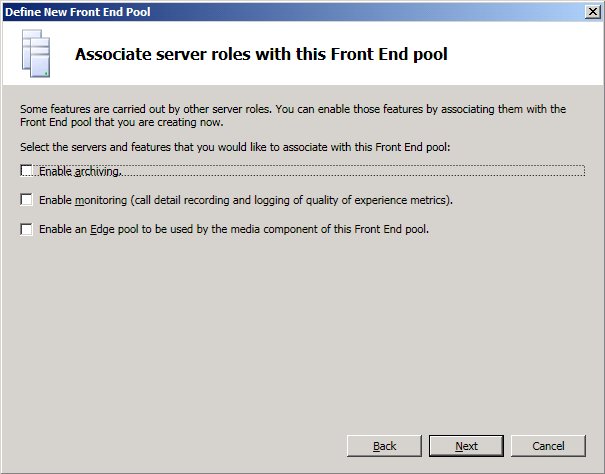
The Associate server roles with this Front End pool option allows you to define and associate server roles with the Front End Server. The three roles that are available are:
Enable Archiving — defines and associates the Archiving Server that collects and stores messages incoming and outgoing from the organization. For example, you must monitor communications for regulatory compliance or quality assurance.
Enable Monitoring — defines and associates the Monitoring Server that collects information in the form of call detail records (CDRs) and call error records (CERs). In addition, the Monitoring Server collects data on the quality of network media for Enterprise Voice and A/V conferencing.
Enable a Front End pool — defines and associates a single Edge Server or a pool of Edge Servers. An Edge Server facilitates communication and collaboration between users inside the organization and people outside the organization, including federated users.
There are two possible scenarios that you can use to deploy and associate the server roles:
For scenario one, you are defining a new topology for a new installation. You can approach the installation in one of two ways:
- Leave all check boxes clear and proceed with defining the
topology. After you have published, configured, and tested the
Standard Edition Front End Server, you can run Topology Builder
again to add the role servers to the topology. This strategy will
allow you to test the Standard Edition server without additional
complications from additional roles. After you have completed your
initial testing, you can run Topology Builder again to select the
roles you need to deploy.
- Select roles that you need to install, and set up the hardware
to accommodate the selected roles.
For scenario two, you have an existing deployment and your infrastructure is ready for new roles or you need to associate existing roles with a new Front End Server:
- In this case, you will select the roles that you intend to
deploy or associate with the new Front End Server. In either case,
you will proceed with the definition of the roles, set up any
needed hardware, and proceed with the installation.
- Leave all check boxes clear and proceed with defining the
topology. After you have published, configured, and tested the
Standard Edition Front End Server, you can run Topology Builder
again to add the role servers to the topology. This strategy will
allow you to test the Standard Edition server without additional
complications from additional roles. After you have completed your
initial testing, you can run Topology Builder again to select the
roles you need to deploy.
-
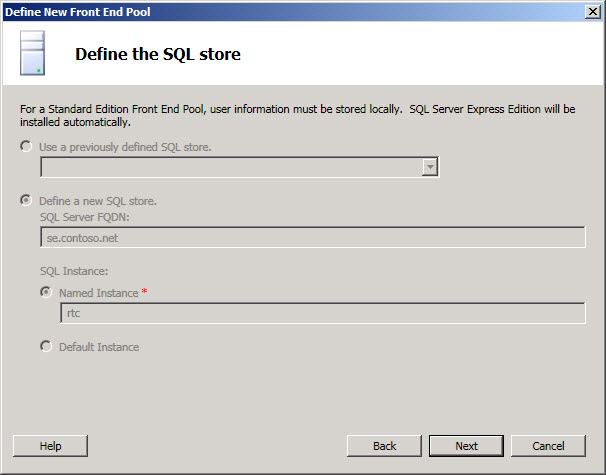
On the Define the SQL store page, all options for Standard Edition are pre-populated for you. There are no selections or changes that can be made. Click Next to continue.
-
On the Define the file share page, do one of the following:
- To use a file share that has already been defined in your
topology, select Use a previously defined file share.
- To define a new file share, select Define a new file
share, in the File Server FQDN box, enter the FQDN for
the existing file server where the file share is to reside, and
then enter a name for the file share in the File Share
box.
 Important:
The file share for Lync Server 2010, Standard Edition can be located on the Front End Server. This might not be an optimal location for your organization’s requirements, and a file server might be a better choice. You can define the file share without the file share having been created. You will need to create the file share in the location you define before you publish the topology. 
- To use a file share that has already been defined in your
topology, select Use a previously defined file share.
-
On the Specify the Web Services URL page, the internal base URL is unavailable because overriding the internal base URL is not necessary for a Standard Edition server, but is for a load-balanced Front End pool.
Enter the external base URL in External Base URL. You would specify the external base URL to differentiate it from your internal domain naming. For example, your internal domain is contoso.net, but your external domain name is contoso.com. You would define the URL using the contoso.com domain name. This is also important in the case of a reverse proxy. The external base URL domain name would be the same as the domain name of the reverse proxy. Instant messaging and presence does require HTTP access to the Front End pool.
 Note:
Note:The base URL is the Web Services identity for the URL, minus the https://. For example, if the full URL for the Web Services of the server is https://se01.contoso.net, the base URL is se01.contoso.net. 
-
On the Specify PSTN gateways page, if the Collocate Mediation Server option on the Select collocated server roles page is selected, define your planned PSTN gateways, and then click Finish.
 Important:
PSTN gateways need to be configured for the collocated Mediation Server. You can configure these later, but full functionality will be limited until the PSTN gateways are defined and configured. If you did not select Collocate Mediation Server in step 4, you will not be presented with the page to specify PSTN gateways. 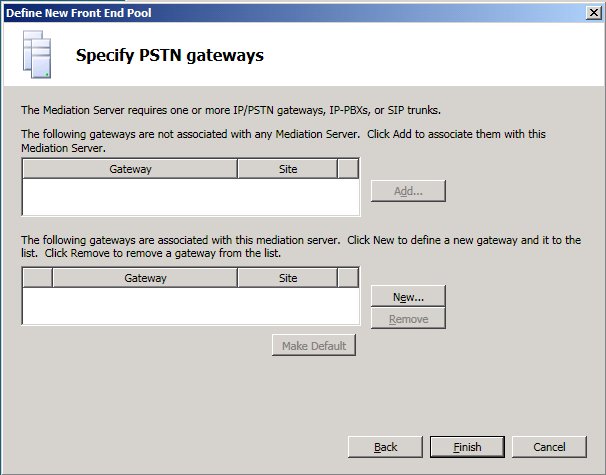
-
To define a new PSTN gateway, click New next to The following gateways are associated with this mediation server.
-
In the Gateway FQDN or IP Address, type the FQDN or the IP address of the new gateway.
-
Confirm or modify the Listening port for IP/PSTN Gateway setting. The default is Port 5067.
-
For SIP Transport Protocol, select TCP or TLS, based on what your infrastructure and PSTN gateway requirements are.
 Note:
Note:Not all PSTN gateways support Transport Layer Security (TLS). Check your gateway’s documentation or contact the vendor to confirm what is supported. Transmission Control Protocol (TCP) is available, but TLS is the default setting, and is recommended for its ability to encrypt the traffic from gateway to Mediation Server. 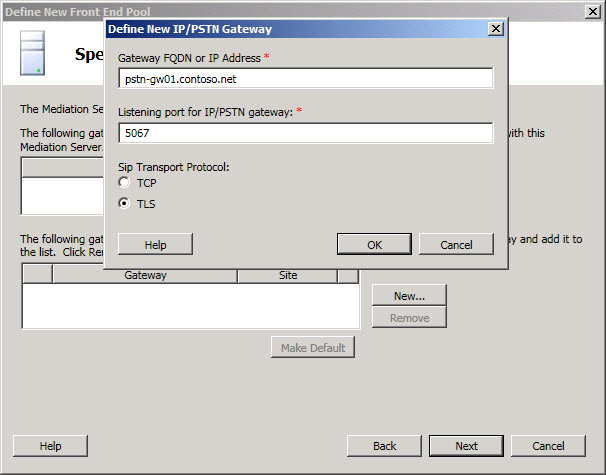
-
Click OK. The PSTN gateway is now listed as associated with the Mediation Server.
-
Follow the previous steps (beginning with step 10), to define additional new PSTN gateways.
-
If you have previously defined PSTN gateways, they will be listed in The following gateways are not associated with any Mediation Server box. Click Add to associate them with this Mediation Server.
 Note:
Note:You can associate more than one PSTN gateway with a Mediation Server. However, you can associate any given PSTN gateway with only one Mediation Server. -
Click Next. If you defined other role servers on the Associate server roles with this Front End pool page, separate role configuration wizard pages will open to allow you to configure the server roles.
-
If you did not select additional server roles to configure and deploy, or when you have finished the configuration of the additional role servers, click Finish.

