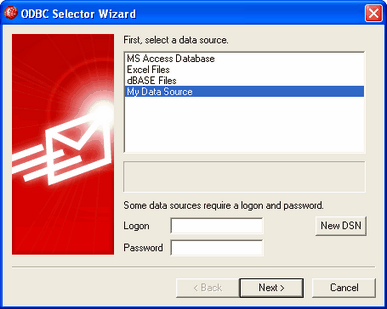
To create a new ODBC data source:
| 1. | On the Account Database dialog (Accounts » Account Settings » Account Database), click Store account data in an ODBC accessible store, and then click Configure to open the ODBC Selector Wizard. |
| 2. | Click New DSN to open the Select Data Source dialog. |

| 3. | Switch to the Machine Data Source tab, and click New... to open the Create New Data Source dialog. |

| 4. | Select System Data Source, and click Next. |

| 5. | Select the database driver for which you wish to set up the data source, and click Next. |

| 6. | Click Finish to display the driver-specific setup dialog. The appearance of this dialog will vary based on which driver you have selected (Microsoft Access Setup dialog shown below). |

| 7. | Designate a Data Source Name for your new data source and provide any other information required by the driver-specific dialog (such as creating or specifying a database, choosing a directory or server, and so on). |
| 8. | Click OK to close the driver-specific dialog. |
| 9. | Click OK to close the Select Data Source dialog. |
See:
ODBC Selector Wizard - Account Database