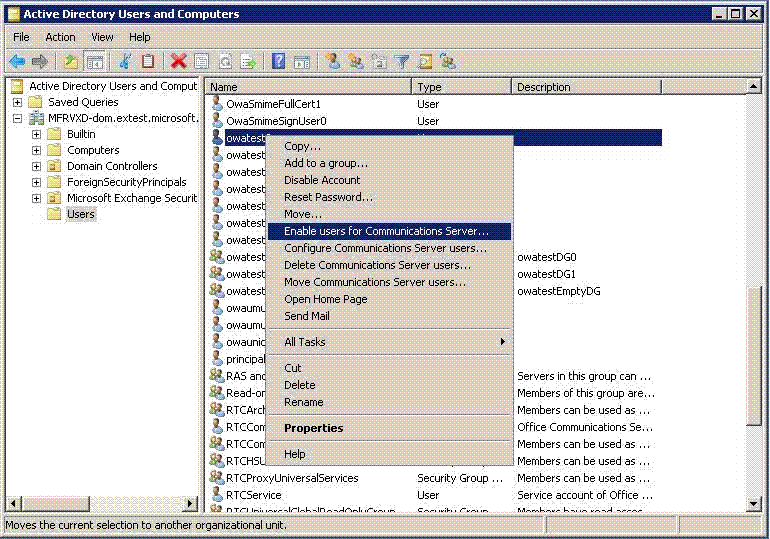
Before Outlook Live users can access IM and presence information by using Web Service Provider, each user must be enabled for Office Communications Server. This requires that the Office Communications Server administrator use the Active Directory Users and Computers administrative tool. The functionality that an administrator needs to use to enable an Office Communications Server user is available in the Active Directory Users and Computers snap-in only if the Office Communications Server 2007 R2 administrative tools are installed on the computer.

|
|---|
| By default, the administrative tools are not installed. Office
Communications Server administrators have to install the tools by
selecting the appropriate setup option from the Office
Communications Server 2007 R2 setup. For installation instructions,
see “Installing and Using Administrative Tools” at
|
 To enable Office Communications
Server users
-
Log on to a server as a member of the RTCUniversalUserAdminsgroup or with an account with equivalent privileges. The server must be a member of an Active Directory domain and have the Office Communications Server 2007 R2 administrative tools installed.
-
Click Start, All Programs, Administrative Tools, and then click Active Directory Users and Computers.
-
Expand the Users folder and locate the user(s) that you want to enable.
-
Right-click the selected user(s) and then select Enable users for Communications Serverto start the Enable Office Communications Server Users Wizard.

-
Click Next.
-
Select the Standard Edition server or Enterprise pool to which you want to assign the user, and then click Next.
-
Specify how to generate the user’s SIP URI by selecting one of the four available options, and then click Next. By default, the user’s email address is used.
-
The Enable Operations Statuspage displays the result of the operation and you can export account information to an XML file if you wish. Ensure that the operation completed successfully and then click Finishto complete setup.


