


Certain features and behaviors that are available to Office Communications Server 2007 R2 clients are determined by registry settings on the client. Administrators can configure registry settings on clients through the use of Group Policy objects, which add, delete, or change the values of entries in the client registry.
There are several Group Policy types, including registry-based, software installation, security, script, and folder redirection. To determine features and behaviors in client applications, you configure registry-based Group Policy objects.
Group Policy objects are applied to clients within selected Active Directory containers, such as sites, domains, or organizational units. This provides administrators with a greater level of detail when determining the client features that are available to users. While in-band provisioning settings are applied to all users within an Office Communications Server pool, Group Policy objects are applied to individual Active Directory containers.
For details about Office Communications Server 2007 R2 client
Group Policy and to download the Communicator.adm file, see the
Microsoft Office Communications Server 2007 R2 Group Policy
Settings documentation at
 How Group Policy Works
Group Policy components are administered using two primary tools. The first tool is Group Policy Object Editor, which is the built-in tool that lets you configure and modify settings within Group Policy objects. The second tool is Group Policy Management Console (GPMC), which is an add-on tool that simplifies the management of Group Policy by letting you create, view, and manage the policies that are applied to your Active Directory containers.
Administrators can define Group Policy settings by using an administrative template (.adm) file, which contains specific information about which Group Policies a particular application implements, where the policies are stored, and how to configure the policies. The user interface for registry-based policies is controlled by using Administrative Template (.adm) files. These files describe the user interface that is displayed in the Administrative Templatesnode of the Group Policy snap-in.
 Note: Note: |
|---|
| Another method for adding, modifying, or deleting registry
subkeys and values is to use a Registration Entries (.reg) file.
Registry Editor uses .reg files to import and export registry
subkeys and values. You can use these .reg files to remotely
distribute registry changes to several Windows-based computers. For
more information, see the Microsoft Knowledge Base article 310516,
“How to add, modify, or delete registry subkeys and values by using
a registration entries (.reg) file,” at
|
Some Group Policy objects directly relate to user-configurable options on the client. Depending on how you configure these policies, the user interface may show an option that is selected or deselected and not modifiable, or the option may be available and user-configurable.
Adding Administrative
Templates
The administrative template file (.adm) consists of a hierarchy of categories and subcategories that together define how options are organized in the Group Policy user interface.
To add Administrative Templates (.adm files)
- Download the Communicator.adm file, available at
http://go.microsoft.com/fwlink/?LinkID=140494 . - Click
Start, click
Administrative Tools, and then click
Active Directory Users and Computers. Select the domain or
OU for which you want to set policy, click
Properties, and then click the
Group Policytab.
- In the
Group Policyproperties page, select the
Group Policy Objectthat you want to edit from the
Group Policy objects linkslist, and then click
Editto open the Group Policy Object Editor snap-in.
- In the
Group Policy Object Editorconsole, click the plus sign (+)
next to either
User Configurationor
Computer Configuration. The .adm file defines which of these
locations the policy is displayed in, so it doesn't matter which
node you choose.
- Right-click
Administrative Templates, and then select
Add/Remove Templates. This shows a list of the currently
active templates files for this Active Directory container.
- Click
Add. This shows a list of the available .adm files in the
%systemroot%/infdirectory of the computer where Group Policy
is being run. Browse to the location where you saved the
Communicator.adm file and select it. Once selected, the .adm file
is copied to the Group Policy Object Editor.
The following figure is an example of how Communicator 2007 R2 Group Polices are displayed using the Group Policy Management Console.
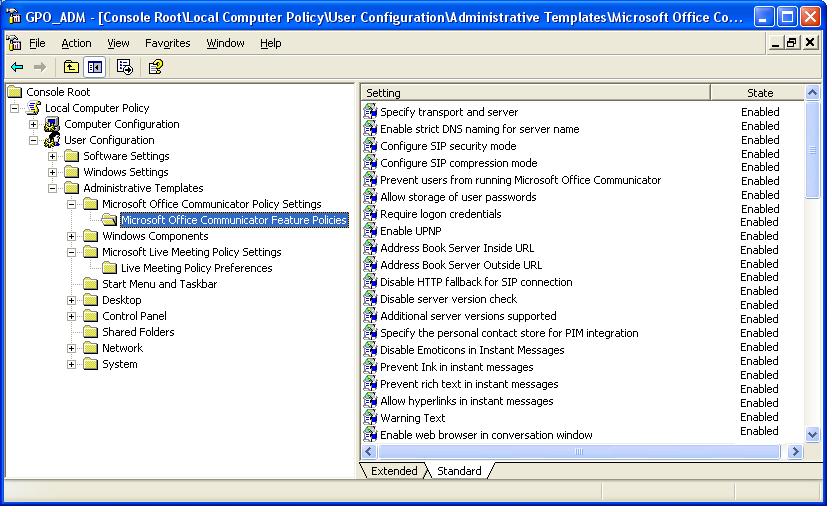
Group Policy Manager view of Communicator 2007 R2 Group Policies
Because Live Meeting 2007 R2, Office Communications Server 2007 R2 Group Chat, Office Communicator 2007 R2, and Office Communications Server 2007 R2 Attendant policies are separate, you can deploy Group Policies for any one of the clients without affecting current or future deployments of any other clients.
Policies for specific clients are described in the following sections: